Hopefully you will never have to refer to this tutorial, but for people who like to play with their routers, it sometimes happens -- you accidentally "brick" your router. This tutorial enables you to recover your router by flashing stock firmware back again using serial console and windows PC. Developers who want to get access to their router by using a serial console may also refer to this tutorial.
Prerequisites:-
- Target router with serial connection pins on board.
- One Ethernet straight cable.
- An appropriate screwdriver, which is used to open the case of the router.
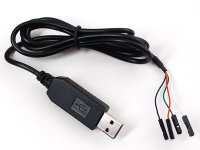
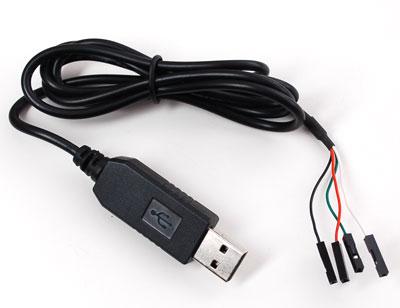
- A USB-TTL cable or compatible serial cable.
- A windows machine installed with following software,
- TFTP Client.
- Serial Client (preferably Putty. Which can be downloaded here).
- Appropriate driver software for your USB serial cable.
Supported Netgear Router Models:-
This tutorial may be referenced for following router models.
Connect serial cable to your router:-
This is very first step in the process. Connect USB end of the serial cable to your windows PC and other end to the serial pins on the board. Visit appropriate link below to get details of the serial pin connection for your router model.
Configure and run serial client on your windows PC : -
In this step you have to configure and launch serial client in your PC. If you are using putty following steps will help you.
-
Identify exact COM port to which your cable is connected:-
Open device manager in your PC [Windows XP: Control Panel => System => Hardware => Device Manager, Windows 7: Control Panel => Device Manager], and click on the "Ports" item, it will show the COM port to which serial cable is connected as shown in Figure 1. In this example, the port that USB to serial connector uses is COM3.
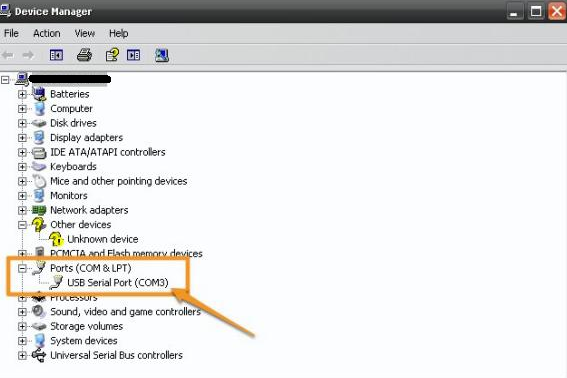
Figure 1: Identify COM port
If you don't see that, re-insert USB end of the cable into your PC and the Device Manager should refresh.
Still COM port is not visible?? Verify if you have installed appropriate serial to USB driver in your PC. Once you have downloaded the driver, reboot the PC and re-insert USB end of the cable into PC and check if the COM port is listed or not. -
Configure and Launch PuTTY:-
-
You'll have to select the Serial radio button, enter the port (whatever port was revealed in previous step) in “Serial Line” section and 115200 in “Speed” section as shown in Figure 2.
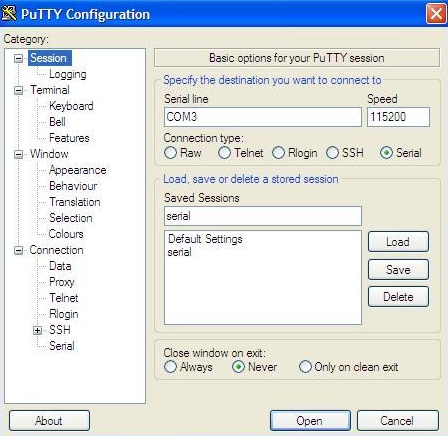
Figure 2 : Configure putty (1)
-
Then, you need to go into the serial settings (Serial on the left menu) and make sure of the following (as shown in Figure 3):
-
Data bits is set to 8
-
Stop bits is set to 1
-
Parity is set to none
-
Flow control is set to none
Figure 3 : Configure putty (2)
-
-
Now click "Open" to launch the serial console of your router. At this stage you will get a blank screen.
-
Change network configuration of your PC:
-
Connect your PC to the LAN port of the router with a straight cable.
-
Go to Control Panel => Your Internet Connection => TCP/IP => Properties and change your IP address as shown in Figure 4.
Note: It is assumed that the router's default IP is 192.168.1.1
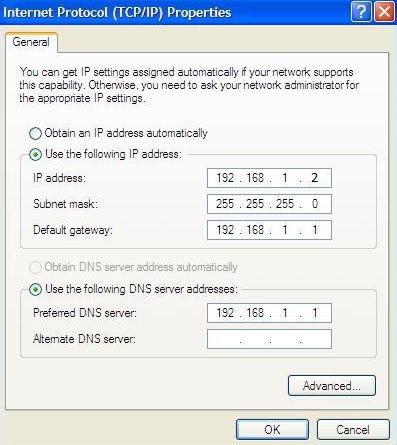
Figure 4: Changing network configuration
Reflash stock firmware to your router:
-
Press “Ctrl” & “c” key simultaneously with the PuTTY window active and power on your router. It will cancel the normal booting of the router and enter into its boot prompt.
-
In boot prompt, enter “tftpd” command to go into “TFTP Server mode”. If the TFTP server successfully started, you will get a message "Reading::" as shown in Figure 5.
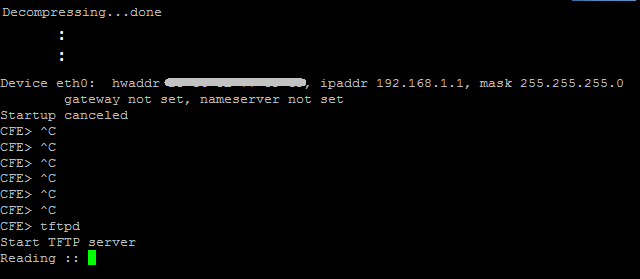
Figure 5: Running tftp server in router boot prompt
-
At this step you should be able to ping 192.168.1.1 (router's default IP) from your PC.
-
Go into the directory containing the firmware file in your PC. Upload the firmware using following command.
tftp -i 192.168.1.1 put <Firmware Filename>
-
After the firmware is transmitted successfully, the router will start flashing it and reboot the unit automatically. You will get messages similar to Figure 6.
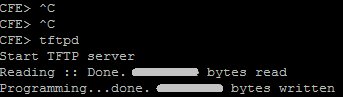
Figure 6: Firmware transferred successfully
-
You will be able to follow the full booting process in your serial console. Allow this process to finish, it will take several minutes, and wait until it is COMPLETELY finished and the command prompt comes.
-
When it's done, you can try accessing your router's GUI via http://192.168.1.1
Recent comments